# Instructions For Burning Tools
#1. Jlink
#1.1. Description
Jlink can usually be used for downloading and debugging firmware, and can be connected to the target hardware through a JTAG/SWD signal cable.
Jlink supporting drivers and software tools, available in https://www.segger.com/downloads/jlink/ (opens new window) Download.
The following is a schematic diagram of common JLink hardware on the market:
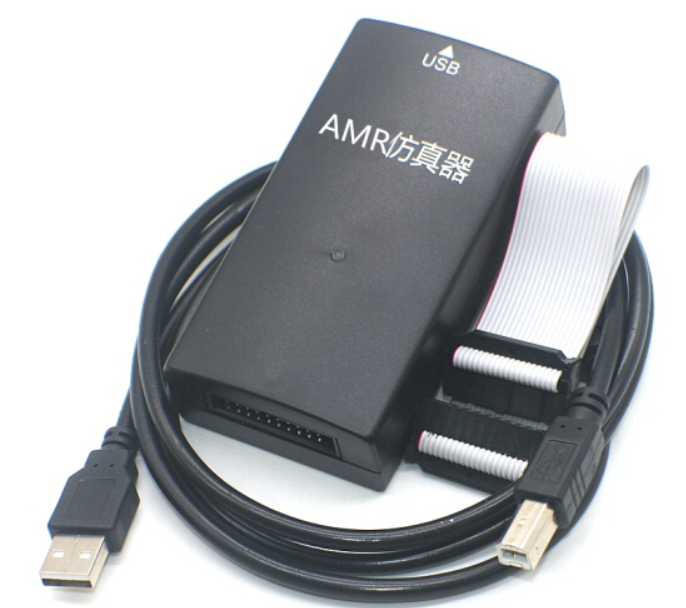
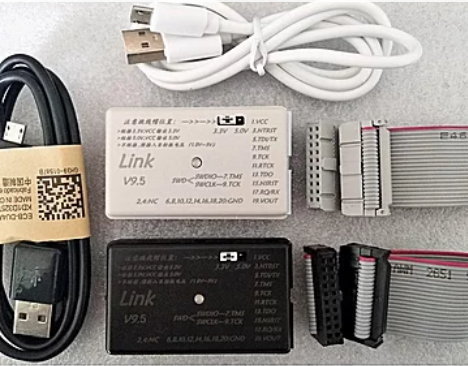
V8 V9
Note: Among all modules that support JLink in MXCHIP, except for the MX1510 platform, when using MDEV+JLink on Windows, the JLink driver needs to be replaced.
#1.2. Replace Jlink driver on Windows
When using Jlink with Openocd tools, special drivers need to be installed on Windows.
The operation steps are as follows
#Step 1: Install Driver
Download and install standard driver: https://www.segger.com/downloads/jlink/ (opens new window).
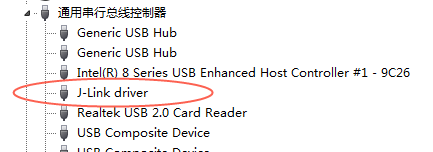
Installation completion display:
#Step 2: Download libusb driver of JLink
Download the libusb driver for Jlink:📎jlink_update_mxos.zip,
extract and run: zadig.exe or zadig_xp.exe (for Windows XP).

#Step 3: Update Driver of JLink
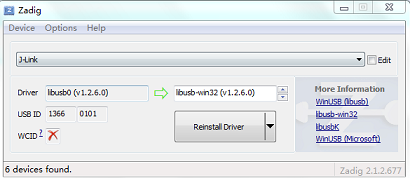
Select the menu: Options ->List All Devices, select J-Link from the dropdown list, select "libusb win32 (v1.2.6.0)" as the driver, click "Replace Driver", and return to "successful" to close. "libusb win32 devices" will appear in the device manager.
#JLink V8
If you are using JLink V8, the update process is as follows:
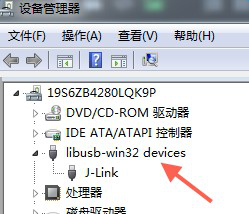
#JLink V9
If you are using JLink V9, the update process is as follows:
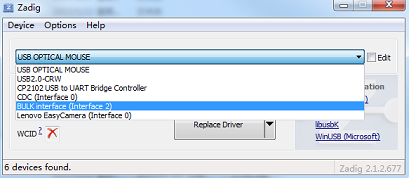
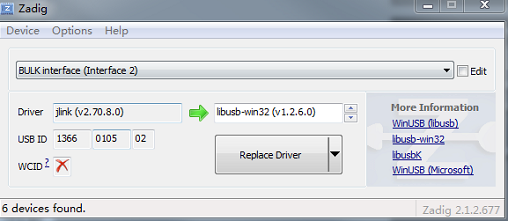
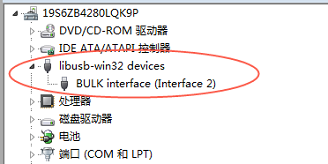
#Abnormal reference
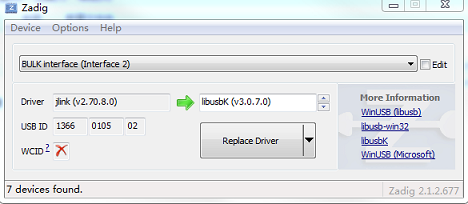
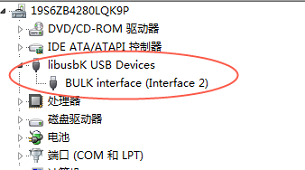
Note: Due to different versions of JLink firmware from different manufacturers, some JLink drivers may not function properly after being replaced with libusb-win32 (v1.2.6.0). In this case, you can try using 'libusbK (v3.0.7.0)'.
#Other: JLink driver replacement
As a universal debugging and simulation tool, if you need to switch back to the jlink driver, you can perform the following operations:
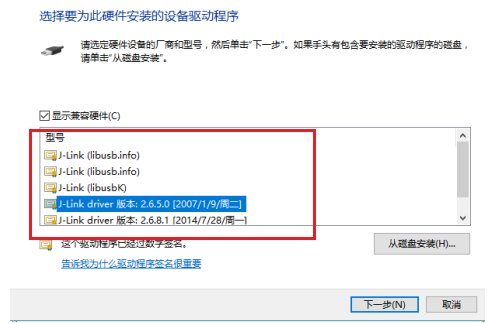
- Computer Device Manager - Select the above image of libusbk USB device ->right-click ->update driver ->browse my computer to find drivers ->let me select from the list of available drivers on my computer.
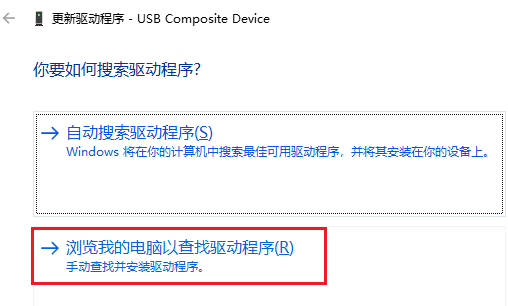
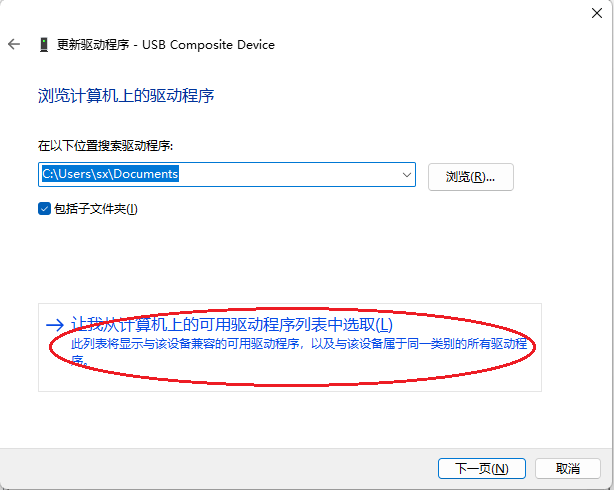
Finally, you can select the driver you need inside and click Next to switch to the driver you need. You can switch between J-link driver and libusbk USB driver.
#1.3 SWD Pin Description in Download Mode
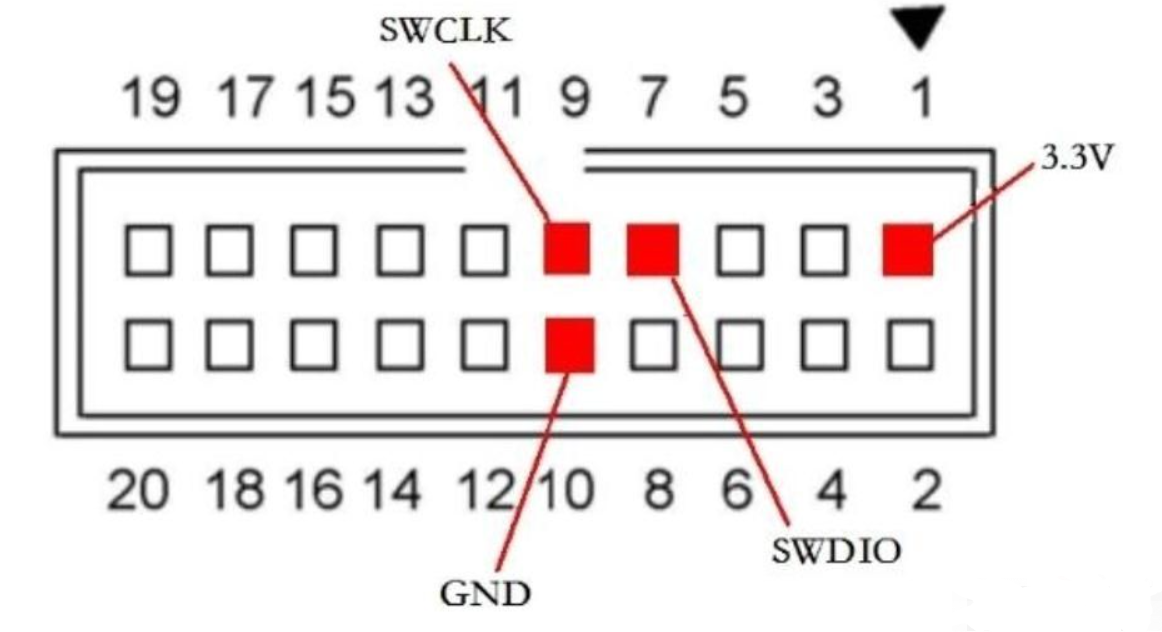
As shown in the above figure, the module that supports jlink burning mainly uses four pins: VCC GND SWCLK SWDIO.
The bottom row of pins are all GND. If there is a poor release, you can try replacing one pin.
#2. mflash
Mflash is the upper computer software output by MXCHIP for the JLink burning of Qingke modules, mainly used in the project debugging phase.
#2.1. Download Software
#2.2. Install Software
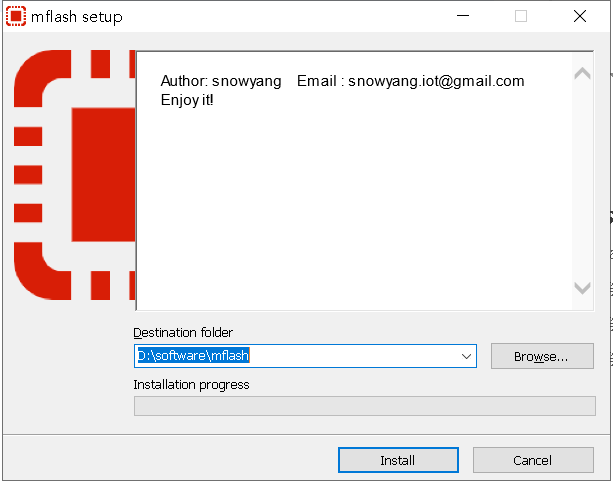
- Download the installation package above, extract it, and execute the installation software with administrator privileges.
- Select the installation path and click Install to install the software.
#2.3 Software Usage
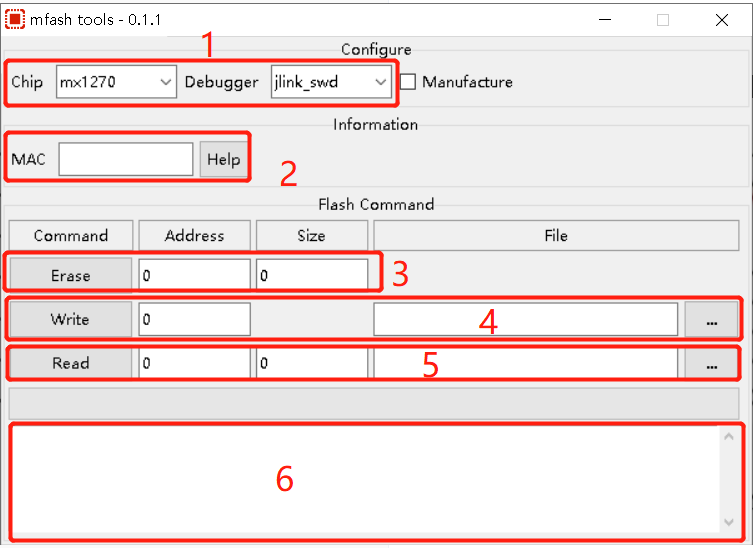
1. Select the chip model and Debugger mode, please contact the technical manager of Qingke for specific information.
2. MAC is the module MAC address obtained by the software after connecting to the module through jlink and entering communication, and does not need to be manually filled in.
3. Erase the designated length area of the module flash starting from a certain address.
a. Fill in the address and length first
b. Click on the Erase button
4. Write firmware to the module, which can be all. bin, ota. bin, app. bin, and other customized binary files.
a. Depending on the firmware, the starting address also varies. For example, for the module of the MX1290 chip, when burning all. bin, the starting address is 0
b. Select the firmware on the PC by clicking the button corresponding to '...';
c. Fill in the corresponding starting address
d. Click the 'Write' button to start writing.
5. Read the flash content of the module by specifying the address and length, and choose the path and file name to save.
a. Select chip model and mode;
b. Fill in the starting address and length;
c. Select the path to save;
d. Click the 'Read' button to read.
6. The running log of the software. If there is an abnormal pop-up message, please check the driver and module connection of the jlink. If there are still problems, please contact the technical manager of Qingke.
If multiple modules need to be burned, you can check the 'Manufacturing' option in the upper right corner. This way, when mflash detects a module connection, it will automatically start burning.
Module Model | Bin File Type | Chip Select | Debugger Select | Write Address |
EMW3080 EMW5080 and so on | .all.bin | MX1290 | jlink_swd | 0 |
.ota.bin | MX1290 | jlink_swd | 0x13000 | |
EMW3070 EMW5070 and so on | .all.bin | MX1270 | jlink_swd | 0 |
.bin | MX1270 | jlink_swd | 0xA000 | |
EMC3080 EMC3180 and so on | .all.bin | MX1300 | jlink_swd | 0 |
EMC3280 EMC3380 and so on | .all.bin | MX131x | jlink_swd | 0 |
#2.4 Common Anomalies
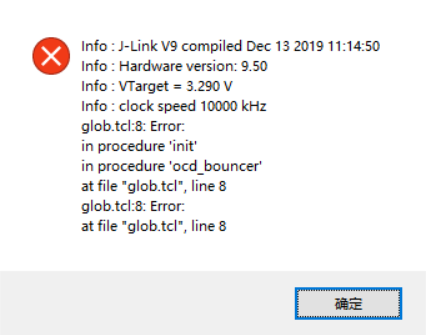
#2.4.1 Poor connection between jlink and module
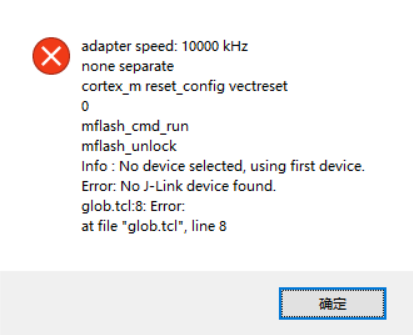
#2.4.2 Jlink is not connected to the computer or the libUSB driver is not updated
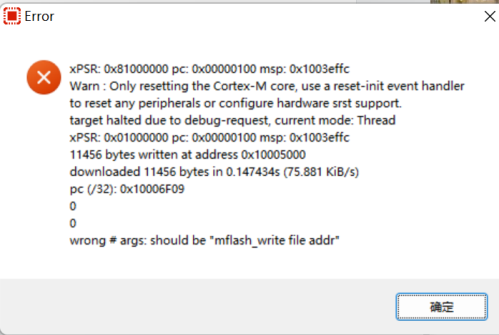
#2.4.3 There are special characters such as underscores in the file path
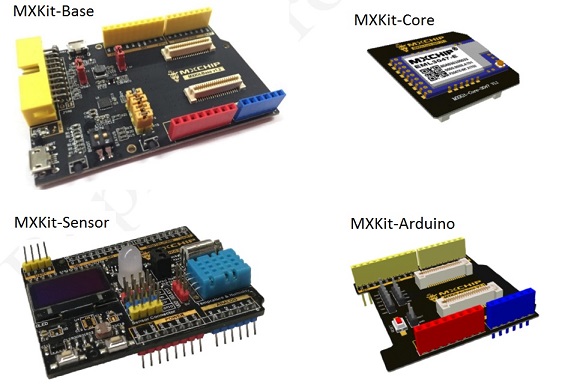
#3. Serial Drivers
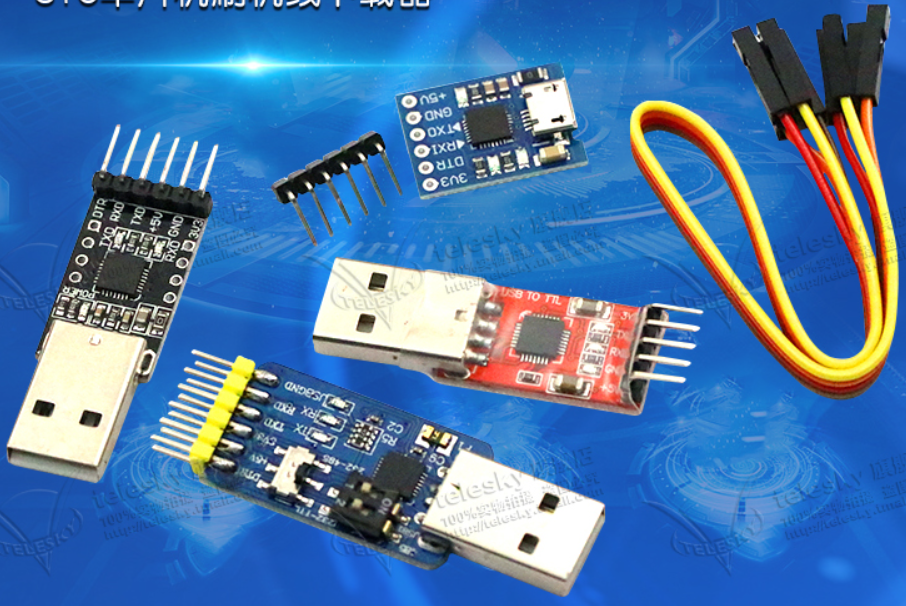
If there is an issue with unrecognized PC serial port during the use of the development board or TTL small board, the driver below can be installed.
#3.1 CP210x Driver
MXKit V2.1 development board uses CP210x chips:
Deriver:📎CP210x.zip
#Update Record
Version | Update | Date |
V1.2 | Optimize Document | 2022.6.22 |
V1.3 | Add mflash address configuration table | 2022.8.30 |
V1.4 | Modify Descriptors | 2022.10.12 |
